
Grip: Snare Drum

 Since I spoke about grip in my National Left Hand Day I feel I should begin with the snare drum grip. Any discussion about grip should begin with the relationship between the stick's stroke and the plane of the drum's surface.  

Newton's first law of motion states:

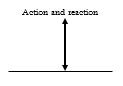
"For every action, there is an equal and opposite reaction."

In a perfect world the bead of the stick will strike the drum head at a 90° angle and rebound at that same 90° angle giving it maximum energy.

However the stick scribes an arc in it's movement to and from the drum since the wrist rotates to create the stroke. This means the bead of the stick is forced to rebound from the plane of the drum surface at an oblique angle. Therefore it's important to reduce this angle by keeping the stick parallel to the drum surface as much as possible. By reducing this angle of attack the drummer can recycle this rebound energy for the following strokes.

                             More rebound energy                   Less rebound energy                

So what does all of this have to do with grip? Initially drums were slung over the right shoulder causing the left side of the drum to be higher than the right. Playing 'matched grip' would require the drummer to raise his entire left arm so that the stick can address the drum at the proper angle. Switching to the 'traditional grip' allows the drummer to achieve this angle without causing undo stress on the left hand, wrist and arm. 

Again referencing the drummer in my previous post, his left arm is raised to a very uncomfortable position and the right stick addresses the plane of the the drum at a height that greatly diminishes the natural rebound making him do all of the work.  

So much for the dynamics of the grip, later I'll talk about their advantages and disadvantages. 


Comments

Popular posts from this blog

The Amadinda

  The Amadinda is an African xylophone originally made from slabs of wood or even large sticks, with or without gourds for resonators. There was no reason for this project other than to see if I could make a simple mallet instrument. The box was made from plywood (which also acted as the resonators) and the bars were made from maple.  Since this was to be a true xylophone, the bars were all of equal width. Tuning was done by cutting the bars to different lengths and removing material from the bottom. Using a router I created a sort of 'stepped pyramid' instead of the traditional arc cut found on marimba or xylophone bars.  Cutting the underside is not only for tuning but it focuses the pitch and creates the characteristic overtones of the instrument. Since I wanted to play this with other 'Western' instruments, I chose to use a pentatonic scale of 2 2/5 octaves (C#,D#,F#,G#,A#,C#,D#,F#,G#,A#,C#,D#). Two people sit on either side of the instrument and strike the ends of ...

Tambourine Shell Repair

A broken tambourine shell usually means that a new tambourine purchase is necessary. This can be exciting: I like getting new instruments, or sad: Any instrument that is damaged is a terrible thing. All tambourine shells can break, from my famous $14 variety to top of the line brands like Grover and Black Swamp. It's easy to replace a tambourine head but broken shells/missing pins and jingles usually means an early grave for the instrument. My early attempts at these repairs were stopgap measures until a new one was found. Wood or 'super' glue used on the shell turned out to be poor choices. It wasn't until last year that I really focused on shell repair. It happened during a Canyon Winds rehearsal when one of our tambourines exploded, pins and jingles were flying everywhere. Yep, it was the Resident Gorilla playing it. The shell had cracked between three sets of jingles near the head of the tambourine. We eventually replaced this with a Black Swamp tambourine but I s...

The Practice Pad

The practice pad has long been a staple for the drummer. After a pair of sticks it usually was the next thing purchased. Or in the case for my brother and I, a DIY project by our father. It could be as simple as a square of linoleum nailed on a board to the double sided models that produce various amounts of rebound.  There are many reasons for using a practice pad. I'll start with the obvious: Practical: Compared to a real drum, they are cheap. They are fairly quiet, you can play them without annoying a sleeping parent or a neighbor in an adjoining apartment. They are portable, they can be taken on a family vacation where space is at a premium. Musical: Usually they provide more rebound than a drum head, which helps in developing single strokes but especially rolls. Articulation: The sound of each stroke is cleaner giving the player important feedback on the precision of their playing. Developing positional accuracy: Drawing a circle the size of a quarter on the pad provides a ...